Monday, June 6, 2011

Sorbetto top and a cheater FBA fitting method

Like many others on the internet, I was thrilled when Sarai and her team at Colette patterns released the free Sorbetto pattern a little while ago. The weather was finally warm in Montreal, the pattern looked quick and easy to sew, and it's easy on yardage so I could use up some of the one yard pieces I have in my stash. The finished product is very easy to wear (see how relaxed I look on my balcony up there?), but it did take some doing to get there.

The problems were entirely of my own making. Instead of doing a full bust adjustment, I cut a straight size 12 with the overly optimistic idea that it was just going to fit. Foolish, right? Every once in a while I do this, probably for a variety of reasons -- laziness, thinking that patterns drafted for a C cup might be just close enough, failure to think about what the pattern will look like on me and not the model, etc. In this case I think I saw the pattern being modeled by Sarai, and I thought to myself, "Her boobs look awesome in that top! Mine will look awesome too!" Of course, I'm forgetting here that I'm not Sarai (Shocking, right? She's an awesome pattern designer, I'm an awesome academic... it's easy to see how you could get us confused).

So, for those who are both full of bust and full of optimism and have cut yourself a size or two too large, here's a method for dealing with full bust fitting problems that I used to save this top. Keep in mind this is NOT a true FBA or a substitute for actual pattern alterations, this is more of a cheater method that can work on an already cut garment (I use this a lot on RTW clothes as well).

First, let's diagnose the problem:


On the left you see what the shirt looked like me on first fitting. This is a nice pattern to troubleshoot fitting problems because what you see after sewing up the side seams is pretty much what you're going to get -- the binding follows the raw edges of the top, so this is essentially what the shape will look like finished. As you can see, the straight size 12 on me is less than ideal everywhere other than the bust. The straps are towards the outer edges of my shoulders rather than being centered, I have a wrinkle at the neckline on my large boob side, I have a lot of gaping around the armhole (enough that it shows my bra from certain positions), and the fit overall is a little loose.

If you've ever wondered whether or not you need a FBA, the armhole is a great clue -- go try on one of your sleeveless ready-to-wear tops and see if you have a big wrinkle or gap there. It looks like the fabric wants to form a dart at the armhole, an indication that you need more shaping. This problem now drives me crazy on RTW tops, but before I started sewing I honestly barely noticed it. Having my bra peeking out at the armholes was just a fact of life, so I made sure to always have nice bras on. No more!

The main problem here is that the armholes and neckline are too large and don't have enough shaping, so we're going to solve that problem with some creative gathering. I started with the neckline because it's easier to fix -- you have a longer distance here and less gathering needed to make it fit. Plus, if you've followed the pattern instructions you already have your staystitching there that you can use for shaping. Just take one of the ends of the threads, and use it to gather the neckline very slightly until it lays nicely against your body. Smooth out the gathers as you go so that they are as evenly distributed as possible. You can see here that the shirt looks better already after I gathered the neckline -- it sits better on my shoulders, and I no longer have that neckline wrinkle (the gathering will create wrinkles as well, but these should be small enough that you can press them out in the end). I also took the shirt in by the side seams, leaving the hem at a size 12, tapering in to an 8 at the waist and back out to a 10 at the armholes.

For the armholes, you'll need to add a line of stitching to use for gathering. I bump the tension on my machine down and put the stitch length up to 4.0 or so to give nice, loopy stitches that are easy to gather with. To keep the gathering in place, I tie off one end of the row of gathering stitches so that it's anchored and doesn't move while you're pulling the other end.

You can see above here that I have a row of stitches just inside the seam line, and where it ends at the side seam I've tied it off. The top is open and ready to gather. Slip the shirt on, get in front of the mirror, and start pulling on one of those top threads until the armhole begins to flatten against your body.

On the left you can see me awkwardly trying to show you how to fit the shirt by pulling on the loose threads. It may be quite puckered, and you may have to find a happy medium between a fitted armhole and a wrinkled blouse. Remember, this is the cheater method so it's not going to get you to fit nirvana if you have lot of bust to deal with.

On the right you can see the difference between the two armholes. See how the one I've adjusted is sitting closer to the body, while the unadjusted one still pops away? When you get something that you're happy with, tie together the threads at the top. This keeps the armhole from loosening back up as you take the shirt off and handle it. You can also adjust the gathers a little bit more to smooth them out and make them more even once you have the shirt off of your body.

After you've finished sewing on the binding, you're going to need to give it a good press to make the binding lay down nicely and to try to smooth out any wrinkles caused by the gathering. If you have a forgiving fabric they might mush out entirely, and if you have a busy print they'll be less noticeable. You can see below I have a few puckers that I'll try to press out here.
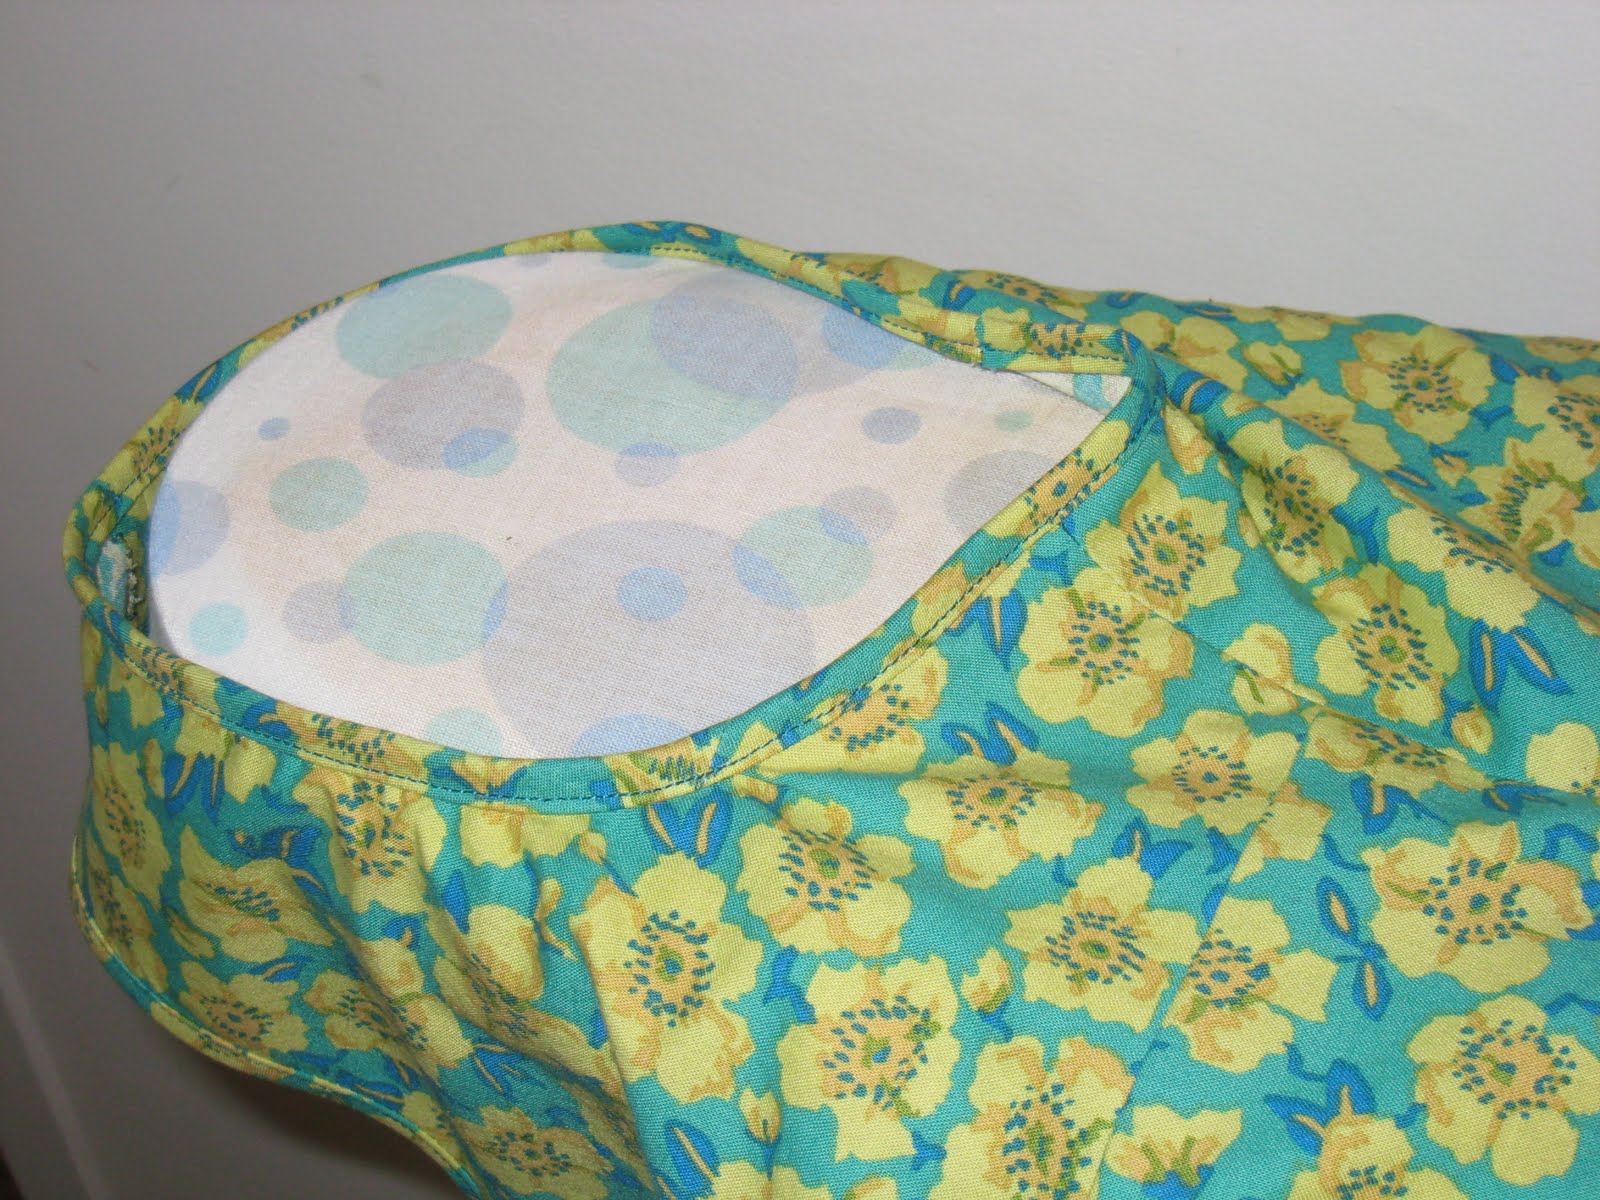

Here's the finished product -- you can see now that my bra is totally covered at the sides, even with my arm raised in this rather unnatural position. The top still feels big through the shoulders, but that's just the way it's going to be since I cut the size 12. Hopefully this method will help some of you fix your gappy tank tops, but I hope even more that my impatience will be a cautionary tale. Fit first, or you'll be annoyed later!

Friday, June 3, 2011

The no-drama blouse

After my last project (a button down shirt that I have yet to photograph because it's been too hot here in Montreal to wear it recently), I wanted to make something that would involve absolutely NO fitting drama, just wear and go right from the pattern.

I decided to make a blouse from a dress in the April '11 Burda issue (dress 135A, in the plus size section -- this is one of those cases where I'm lucky to be a size 44 in Burda patterns because it often means I just fit into the high end of the normal and the low end of the plus patterns!). As a dress I thought this might end up a little shapeless overall, but I thought it might work as a blouse in a very drapey fabric. It's also perfect for a no-drama project fitting wise. It has raglan sleeves (therefore no fitting that the shoulders), lots of space in the bust and the waist, and opportunities for gathering the neckline a bit more if it's looking too wide. I used the purple rayon print from my trip to Japan, which was a tight squeeze out of only a yard of fabric but doable.

The construction was super easy; I didn't do anything fancy on the inside other than finishing off the seams with my faux-serger stitch on my Pffaf and I finished the arms and neckline with self fabric binding. I like the way that the binding gives the bottom of the sleeves just a little volume.

The neckline did turn out to be a bit wide on me, which is at least partially my fault for not staystitching it to keep it from stretching out during construction, but it probably at least partially because the pattern is drafted for someone who's wider across the shoulders than I am. I considered just easing the neckline into the binding to reduce the width all around, but I ended up just gathering it between the two raglan seams at the back. Reducing the width right there rather than all round seems to help it stay in place on the shoulders better (which it does pretty well, considering what a big neckline this is).

Silly things that I did here that I should know better than to do by now: The blouse ended up being a bit short; it's okay, but definitely could have used another two inches. I guess I just didn't plan well here and it wasn't until it was all cut and hemmed that I realized it was a little 80's cropped shirt looking. Since it's a blousy blouse I didn't want it to become long and tent like, but the blousiness also means that cutting it a bit short makes it feel quite short. I also cut the binding strips on the straight grain rather than the bias. I certainly know better than to do this, but I had a severe lack of fabric here and thought the fabric was drapey enough that I could get away with it. Obviously you can, but it's not ideal and the neckline doesn't lay as nicely as it could.

One major lesson to take away for the future here is that I need to stop buying one yard pieces of fabric as souveniers! I always think that I can squeeze a top out of a yard of a fun print, and then I always do end up *just* squeezing a top out. From now on I'll buy myself 1.5 yards minimum of "just for fun" fabrics.

Thursday, June 2, 2011

And the secret ingredient is...

I was having one of those indecisive moments at the grocery store last night where I just couldn't decide what I wanted to eat. All of the dinner ideas that I was coming up with were pretty dull, so I decided to go over to the produce section and pick something that looked tasty and build a dinner around that. I settled on a bunch of broccoli rabe, which I've never cooked before but seems like something that I should definitely like given my extreme love of broccoli. After googling it later on it seems that it's more closely related to turnips than broccoli, but it's all to the good since I like turnip greens, too.

Here's what I ended up making:

It's a pretty simple concoction just using what I had in the fridge and pantry (which is not a lot, since I've been doing a lot of traveling these days): onions, garlic, olive oil, chick peas and the broccoli rabe. There is a secret ingredient, though, and it's not broccoli rabe. It's poutine sauce! While I was thinking about what to put in here as far as seasoning I remembered that I had a leftover container of poutine sauce in the fridge from last night (St Hubert always gives you just a little bit too much sauce with the poutine, I think). So I dumped in the poutine sauce, some sriracha and a bit of lemon juice, and there you have it--broccoli rabe a la Montreal!

Wednesday, May 25, 2011

Cubicle makeover

This is a project that has been a long time in the making! I finally got around to sewing the last panel of fabric and hanging it up today, and am now officially ready to unveil my newly decorated cubicle. Back in Ithaca, I had my own little office (shared with my SO) in a crappy old building that probably should have been demolished but instead was given over to grad students. Here at my new job I have a desk in a lovely old building that is a former house, and I share the old parlor (fireplace and all!) with several other grad students and postdocs.

The only downside to this setup is that the university has provided us all with office-beige cubicles, which I find totally depressing. If you're going to look at a wall for 8+ hours a day, it had better not be a wall colored in oatmeal-colored synthetic fabric, IMHO. So, I gave myself a bit of a budget to make over this average looking cubicle.

Here's a few pictures from before.


The bay window that I have in my cubicle spot is amazing, and I knew right away I wanted to get some plants to put in there. I also knew right away that the ugly and dim lamp that the desk came with was going to have to be replace with something that was actually useful for reading and not hideous.

Most of the makeover supplies were purchased at Ikea. I bought a few yards of inexpensive fabric and sewed fabric panels for each wall. Figuring out how to attach these was a little tricky, but it's actually pretty easy to pry the plastic tops off of the cubby walls and use these to hold the fabric panels in place. The tea kettle that I bought at a different store just happened to match perfectly with the Ikea fabric!


I bought a shelving unit from Ikea for holding plants, teapots and snacks. You buy the metal side panels separately and then attach the length and width of shelves that you want to finish it off. Since the side panels are metal they're also perfect for storing my canisters of office supplies. I'll admit to being drawn in by the shelving unit because of the green. What can I say? I love green!

The white bookshelf was brought up from home, and is mostly stuffed full of tea and gym clothes right now. It's woefully inadequate for holding all of my academic books, and so when those eventually come up from Ithaca I'll have to decide if I want to buy more shelves or keep them at home.

In all, I spent a bit under $150 on my desk revamp, on fabric ($15), the lamp ($30), the kettle ($50), the shelf parts ($25) and the orchid and pot ($20). Future plans will probably include more shelving for books, cushions for the window sill, and hopefully a nice piece of art (if I can find something I like and can afford!).

Saturday, April 30, 2011

Finally, some bike related news!

Finally, after months of cold and bikeless Montreal winter, I have some bike related news to share. And it's big exciting bike related news, too... what could be more exciting than coming home and finding a new bike in the middle of your living room? Tada!

The bike is a graduation present from my sweet and wonderful SO. When I came back to Ithaca for a visit, I walked in and found the bike all set up. I was totally surprised! I would never manage to keep quiet about something like this for a month or so, but he's a much better secret keeper than I am.

When the SO told me that he wanted to build me a bike as a graduation present months ago, we had a few daydreaming sessions about what it would look like. Much as I do love my touring bike, I really wanted a true city bike for everyday riding around. One of my major requirements for the bike was that I should be able to hop onto it and go, with no special shoes, strapping my pants down, bringing a pannier to carry my purse, or worrying about whether I could wear a skirt. Translating this into technical requirements, we decided that such a bike would have a step-through frame, chain guard, a reasonably upright riding position and some sort of basket. And since it's my dream bike it would also be green, preferably a nice bright apple green (mock me if you want, but I know what I like!).

Shockingly, such a bike already exists in the world, right down to the apple green paint. While my SO had a custom build in mind initially, he found the Civia Loring bike while flipping through some product catalogs with our local bike dealer.

It's like someone reached inside my head and pulled out the perfect bike! It has a front basket with a nifty little spot to hang your lock (always an issue on my previous bikes since there's not a really good place to mount a lock on my small frames). The bike also has some fabulous things that I hadn't even thought of, like an internal gear hub and disc brakes. Since I have small (and somewhat weak) hands and Ithaca is a hilly city, I've long had problems with stopping power and the disc brakes are a nice upgrade.

As always, there are still some things to tweak. The bike doesn't have lights right now, so probably installing lights and a generator hub will be a project for the near future. I'm also not sure about the front carrying rack that came with the bike -- it's pretty heavy, which makes it somewhat awkward to lift up stairs, and I'm also still paranoid about stuff sliding out of the shallow tray thing (although this hasn't happened yet). I'm leaning towards getting a basket of some kind, but we'll see.

So, isn't that a fabulous update? Wave if you see me whizzing around town on my new bike!

Thursday, April 21, 2011

The four horsemen of the stashpocalypse

Sarai wrote a very thoughtful a post on the Colette Patterns blog the other day about balancing a compulsive sewing habit with an equally strong desire not to hoard and over-consume. This post really struck a chord with me because I've been on a fabric buying lockdown all year in an effort to reduce my stash. When I moved up to Montreal in January it became embarrassingly apparent just how much fabric I've been hoarding -- I packed up a massive tupperware bin of fabric to take with me, and I still have more at our apartment in Ithaca. And I'm clearly not the only one with this problem, as evidenced by the response to Sarai's post.

Reading everyone's comments about hoarding control mechanisms made me think about why exactly it is that I do this. Some of the reasons are not so bad, perhaps: I buy fabric because I love nice fabric, and it's fun to stop in the garment district when I'm passing through NYC or traveling somewhere else and buy a few fabric souvenirs. But I also have a well-documented tendency to take on too many projects that I never get around to doing (and to be fair, I've had very little time to sew for the last six months so my backlog is worse than usual).

Inspired by all the talk of de-stashing, I pre-treated a bunch of fabrics tonight that I would like to sew with soon. As I was folding them, it occurred to me that each of these fabrics represents a different problem that keeps me from actually using the fabric I have stored up.

1) A purple rayon print from Japan. I bought this fabric as a souvenir and because I loved the print, but inspiration has yet to strike on this one. Every time I look at it, I just can't picture what kind of top it wants to be. I'm actually not so worried about this anti-stashing issue, because I think the moment will come for this fabric eventually.

2) A cotton double gauze, also from Japan. This fabric falls into the category of fabrics that I would be heartbroken if I screwed up. This piece was expensive enough and I love the print, and so even though I'm dying to make something out of this and wear it around I keep avoiding it in case the thing that I make doesn't turn out well. I would hate to make a dress out of this that ended up in the back of my closet.

3) Shirting from Paron Annex. This is one of several fabrics in my stash that I avoid because I feel like my technical skills are not quite up to the task of making what I envision. In this case it's not that the cotton shirting itself is hard to work with, but I fear that the button down shirt that I plan on making might be above my skill level. I could make a tester shirt out of a cheaper fabric to practice shirtmaking techniques, but I hate sewing stuff out of crappy fabric that I'm not really excited about (catch 22, anyone?)

4) Lightweight cotton from Quilter's Corner in Ithaca. Here I have exactly the opposite problem from fabric number one: I have way too many ideas of what to do with this fabric. I've mentally drafted four or five different summer shirts with this fabric in mind, but all that inspiration makes me indecisive. If I lock in one plan, I kill off all the other possibilities!

So there's my four horsemen of the stashpocalypse. Of all these, I've decided that the least tenable reason not to sew is number three -- there's no reason to not make something (or to buy cheap fabric and make something I don't love) just because I'm afraid my skills aren't up to it, especially when the fabric wasn't insanely expensive, I have lots of it, and more cotton shirting can easily be found elsewhere. Classic button down shirt, here I come!

Monday, April 18, 2011

Towards a personal blouse pattern

For a while now I've had the sewing goal of trying to work up a set of basic patterns that I can use for altering commercial patterns and drafting my own designs. I worked on this basic pencil skirt pattern a few months ago, and next up was figuring out a basic princess seam top.

I'm sure I'm not the first one to post this lament on the internetz, but as a short and reasonably busty woman button down shirts rarely-to-never fit me properly. Usually they're some combination of too tight/gappy at the bust, too big in the shoulders and too long in the arms. I've used various tricks to overcome these problems over the years, like rolling up the sleeves, wearing shirts partially unbuttoned over camis, or stitching down part of the front so that it can't gape. But, I think I have enough fitting knowledge now that I can actually make something that fits properly, and this is my first attempt at that.

This shirt is actually a remake of a shirt I made some time ago, one of my first blouse attempts:

I loved the idea, but the blouse suffered from a few issues that made it uncomfortable to wear, namely: too big in the shoulders and gaping neckline, not big enough in the waist so it was tight when I sat down, and I used crappy quality quilting cotton (terrible beginner's mistake, I know) which made it stiff. Despite all of the time spent carefully piping this bad boy, I gave it away when the SO and I moved in the summer.

This attempt is made from a bit of a frankenpattern, which combines the bodice of the JJ pattern, the sleeves of the Ute pattern, and a self-drafted collar. The first item of clothing that I ever made from a pattern was a JJ blouse, and looking back at it the fit was remarkably good for a first attempt (I still have that blouse, but I'm not sure I'm brave enough to post it on the internetz. It's also in quilting cotton!). I started with a 40 bodice and did a FBA, adding to both the side and front panel to try to get that seam right over the bust. Since the piping attracts a lot of attention to the seam line, I wanted to make sure I got the placement right. In retrospect, I wish I'd done armhole princess seams, because I think that the shape would have been even more flattering with the white piping.

I was originally planning to modify the Ute collar, but after fiddling with it I decided to just draft my own. I really wanted to make sure that this shirt would end up being work appropriate (i.e., not too low cut), and I just wasn't trusting that Burda neckline! Once again, this vintage sewing guide proved very helpful. The little trick about adding 1/8 inch to the neck seam to get a nice roll on the collar worked perfectly for me. Other finicky details: I made all of the piping by hand with 1/16 inch poly cord (it was pretty time consuming!) because I wanted a nice thin piping to go with the small dots, and to get practice in making piping for my next project. It's this kind of stuff that makes sewing go so slowly for me!

Here's some views from the side and back:


Looks pretty good from the side, I would say, but the fit does look a bit blousy in the back. In general the top feels pretty loose around the middle when I'm standing, but I was reluctant to take it in because it isn't all that loose when I'm sitting. My waist changes shape enough when I'm in a seated position that I think I have to deal with the extra room when standing in order to be comfortable sitting. I'll wear it to work for a day before giving the pattern a final verdict, just to see if it becomes uncomfortable at some point in the day. If you're stopping by and have any other fit suggestions, I'd love to hear them!