 Like many others on the internet, I was thrilled when Sarai and her team at Colette patterns released the free Sorbetto pattern a little while ago. The weather was finally warm in Montreal, the pattern looked quick and easy to sew, and it's easy on yardage so I could use up some of the one yard pieces I have in my stash. The finished product is very easy to wear (see how relaxed I look on my balcony up there?), but it did take some doing to get there.
The problems were entirely of my own making. Instead of doing a full bust adjustment, I cut a straight size 12 with the overly optimistic idea that it was just going to fit. Foolish, right? Every once in a while I do this, probably for a variety of reasons -- laziness, thinking that patterns drafted for a C cup might be just close enough, failure to think about what the pattern will look like on me and not the model, etc. In this case I think I saw the pattern being modeled by Sarai, and I thought to myself, "Her boobs look awesome in that top! Mine will look awesome too!" Of course, I'm forgetting here that I'm not Sarai (Shocking, right? She's an awesome pattern designer, I'm an awesome academic... it's easy to see how you could get us confused).
So, for those who are both full of bust and full of optimism and have cut yourself a size or two too large, here's a method for dealing with full bust fitting problems that I used to save this top. Keep in mind this is NOT a true FBA or a substitute for actual pattern alterations, this is more of a cheater method that can work on an already cut garment (I use this a lot on RTW clothes as well).
First, let's diagnose the problem:


On the left you see what the shirt looked like me on first fitting. This is a nice pattern to troubleshoot fitting problems because what you see after sewing up the side seams is pretty much what you're going to get -- the binding follows the raw edges of the top, so this is essentially what the shape will look like finished. As you can see, the straight size 12 on me is less than ideal everywhere other than the bust. The straps are towards the outer edges of my shoulders rather than being centered, I have a wrinkle at the neckline on my large boob side, I have a lot of gaping around the armhole (enough that it shows my bra from certain positions), and the fit overall is a little loose.
If you've ever wondered whether or not you need a FBA, the armhole is a great clue -- go try on one of your sleeveless ready-to-wear tops and see if you have a big wrinkle or gap there. It looks like the fabric wants to form a dart at the armhole, an indication that you need more shaping. This problem now drives me crazy on RTW tops, but before I started sewing I honestly barely noticed it. Having my bra peeking out at the armholes was just a fact of life, so I made sure to always have nice bras on. No more!
 The main problem here is that the armholes and neckline are too large and don't have enough shaping, so we're going to solve that problem with some creative gathering. I started with the neckline because it's easier to fix -- you have a longer distance here and less gathering needed to make it fit. Plus, if you've followed the pattern instructions you already have your staystitching there that you can use for shaping. Just take one of the ends of the threads, and use it to gather the neckline very slightly until it lays nicely against your body. Smooth out the gathers as you go so that they are as evenly distributed as possible. You can see here that the shirt looks better already after I gathered the neckline -- it sits better on my shoulders, and I no longer have that neckline wrinkle (the gathering will create wrinkles as well, but these should be small enough that you can press them out in the end). I also took the shirt in by the side seams, leaving the hem at a size 12, tapering in to an 8 at the waist and back out to a 10 at the armholes.
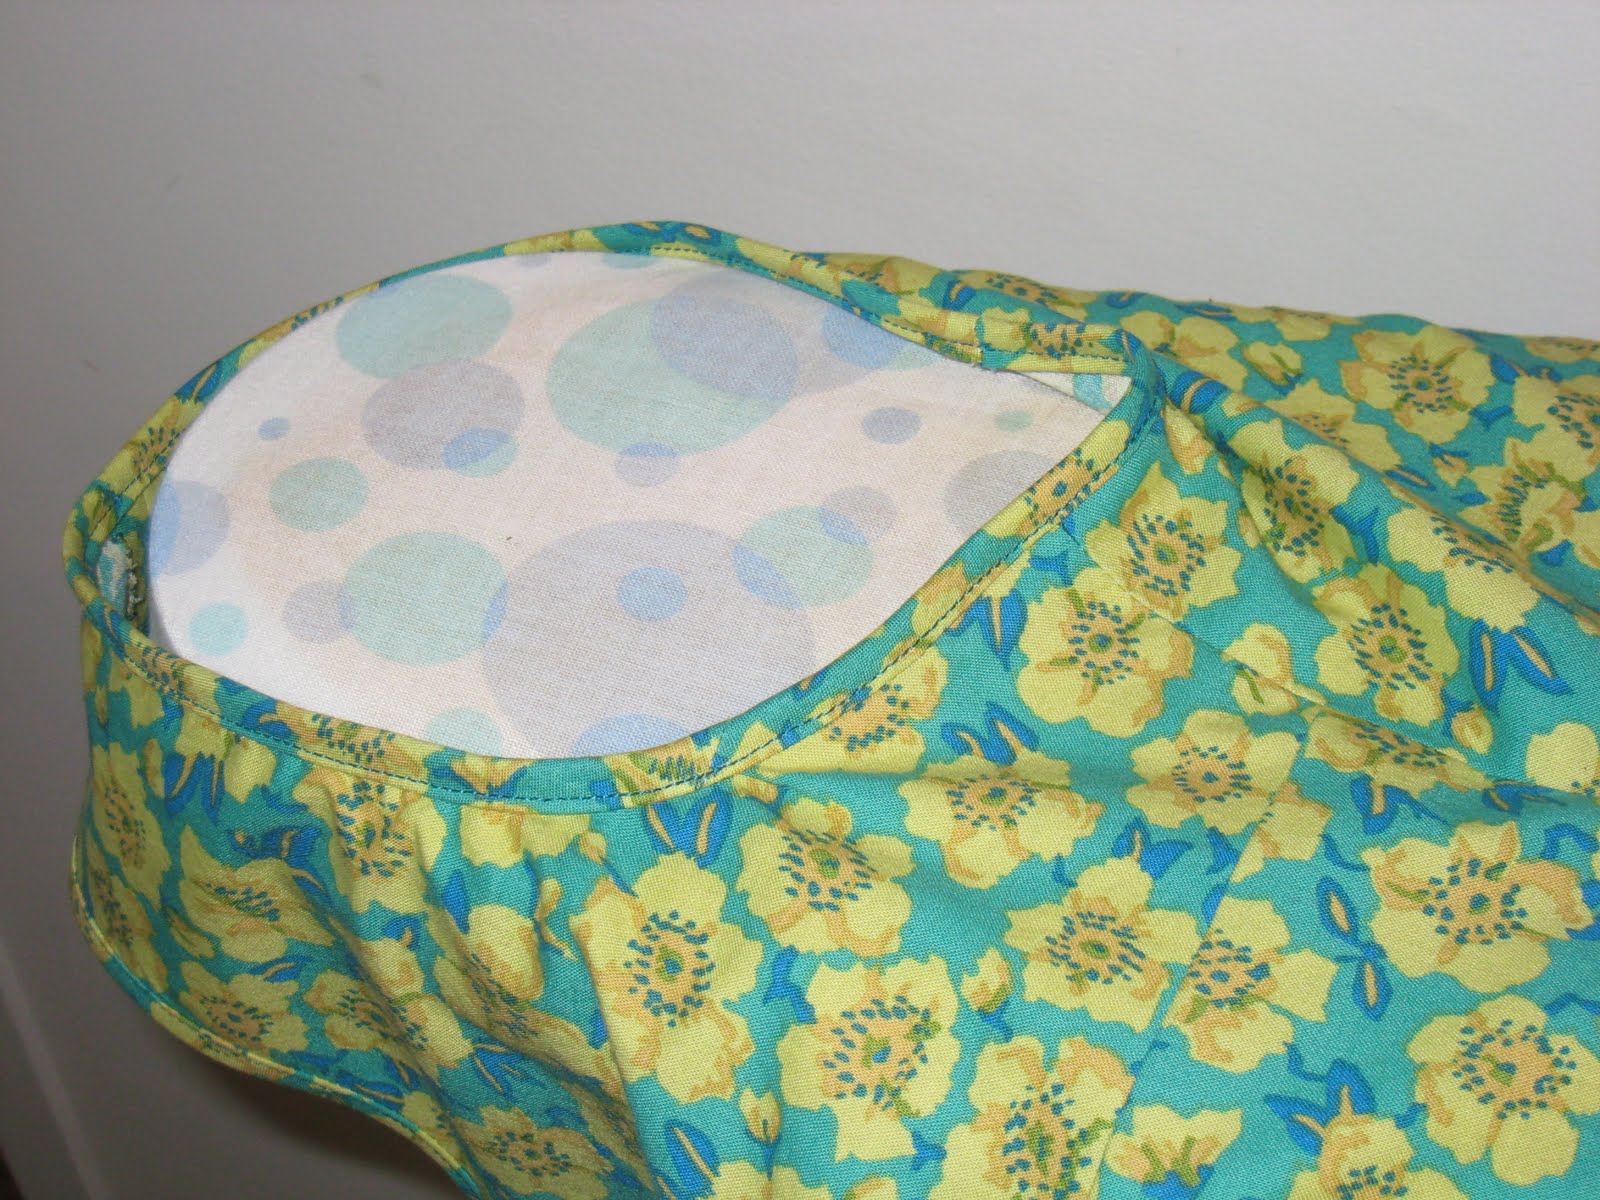
For the armholes, you'll need to add a line of stitching to use for gathering. I bump the tension on my machine down and put the stitch length up to 4.0 or so to give nice, loopy stitches that are easy to gather with. To keep the gathering in place, I tie off one end of the row of gathering stitches so that it's anchored and doesn't move while you're pulling the other end.
 You can see above here that I have a row of stitches just inside the seam line, and where it ends at the side seam I've tied it off. The top is open and ready to gather. Slip the shirt on, get in front of the mirror, and start pulling on one of those top threads until the armhole begins to flatten against your body.
 On the left you can see me awkwardly trying to show you how to fit the shirt by pulling on the loose threads. It may be quite puckered, and you may have to find a happy medium between a fitted armhole and a wrinkled blouse. Remember, this is the cheater method so it's not going to get you to fit nirvana if you have lot of bust to deal with.
On the right you can see the difference between the two armholes. See how the one I've adjusted is sitting closer to the body, while the unadjusted one still pops away? When you get something that you're happy with, tie together the threads at the top. This keeps the armhole from loosening back up as you take the shirt off and handle it. You can also adjust the gathers a little bit more to smooth them out and make them more even once you have the shirt off of your body.
After you've finished sewing on the binding, you're going to need to give it a good press to make the binding lay down nicely and to try to smooth out any wrinkles caused by the gathering. If you have a forgiving fabric they might mush out entirely, and if you have a busy print they'll be less noticeable. You can see below I have a few puckers that I'll try to press out here.
 Here's the finished product -- you can see now that my bra is totally covered at the sides, even with my arm raised in this rather unnatural position. The top still feels big through the shoulders, but that's just the way it's going to be since I cut the size 12. Hopefully this method will help some of you fix your gappy tank tops, but I hope even more that my impatience will be a cautionary tale. Fit first, or you'll be annoyed later!
I saw this pattern too and thought it would be great for a "quick to sew" tank. But I didn't hit the download button because I was concerned about the fit, never having made one of the Colette patterns. I am glad you were able to work out the fitting issues. The altered version looks great and the colors in the print are really flattering to you.
ReplyDeleteI had some of these same problems on my first Sorbetto attempt. Plus a really low bust dart. It may be too late for that top, but now I know how to save the second one I cut out before even sewing the first. Never again.
ReplyDeleteThanks for the great tips!
Thanks stephthecostumer, I'm glad it helps! I figured I couldn't be the only one out there who was lured in by the idea of a quick summer top and forgot that simple to sew does not always equal simple to fit...
ReplyDeleteI am having similar issues with my Sorbetto - some gaping at the armholes and the shoulders are just a touch too wide. I'm planning to make more than one of these, and I'm curious to know if you would recommend an FBA to fix these issues before sewing instead of using the gathering method you've chosen to fix a pattern that's already cut.
ReplyDeleteHi Meg, I would absolutely recommend doing an FBA if you haven't already cut into your fabric -- this method was just a "save" for a blouse that was already cut out and not going to be wearable unless I did something to fix it. It's not ideal and still feels like I have too much fabric up top (especially when I sit down, the top of the shirt bunches up a lot). I'm actually working on a Sorbetto 2.0 now starting with a size 6 (based on my high bust measurement of 36") and doing a FBA from that.
ReplyDeleteI'm trying this right now! I made a muslin sorbetto earlier this year and cut a 16 thinking that would accomodate my bust. It could have accomodated two of me! Uninspired I put it down and never bothered finishing. Today I bought some cute fabric and thought 'I know! I'll try the sorbetto again but cut a 12 this time'. Bust fits well, but I have your exact problem on my arms and neckline. I'm going to try the gathering now. Thanks!
ReplyDeleteMy first Sobretto was a perfect fit except for some armhole gaping, totally fixed with your nifty trick. Thanks for sharing!
ReplyDeleteGlad to hear it worked for you, Sally!
ReplyDelete